
Attach Aluminum Fascia
The most general method to attach aluminum fascia is to use a long shank (1 ¼”) Phillips head screw that has been coated with thread sealant. The aluminum fascia must be located on a surface that will allow you to drill and completely penetrate it. You can then attach the aluminum fascia by driving the screw into the wood substrate, effectively holding it in place. AlumaShield or other metal shield products are used to fill in the gaps and holes between each piece of aluminum fascia.
A more permanent way to attach aluminum fascia would be to use a “cleat” system. The cleats are typically 1 ½” by 2 ¼”. They screw into the wood substrate using #8 wood screws and then they hold onto the aluminum fascia by having special cut-out sections for screwing into.
After you have attached your aluminum fascia to either system, you will want to cover any exposed areas with an aluminum guard or Metal Shield. The products are applied directly over the exposed aluminum. The Alum Guard is a metal mesh that is installed before you install your aluminum fascia, and the Metal Shield comes in sheets.

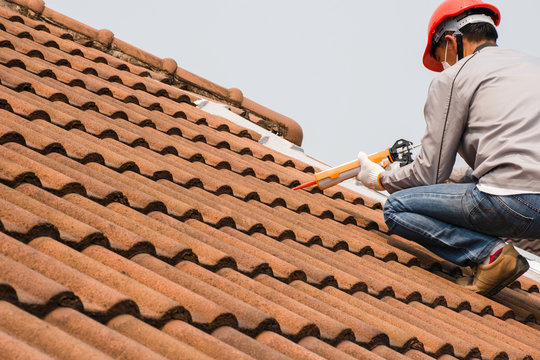
The most important thing when installing any type of roof repair material is to make sure everything is level and plumb. All protruding ends must be cut to length and hammered down securely underneath the base sheet so that there will not be any future problems with buckling or lifting.
Use roofing nails for roof repair to secure the base sheet in place.
Other important considerations are that there should be an overlap of at least half an inch on each side of the fascia panels, and you must have constant ventilation under the eaves area, such as soffit vents or ridge vents.
Alumasym is a self-adhesive aluminum-polymer composite metal panel designed for use in residential/commercial applications where thermal insulation is not needed. Alumasym is available with a 50mm (2″) or 100mm (4″) center core utilizing tin (6010 alloys) to provide corrosion resistance for up to 15 years when exposed to harsh environmental conditions including salt spray and oxidation. No other products can give you as much protection as Alumasym.
Specifications:
A front-projecting aluminum fascia is installed on top of the roof while the roof repairs overhang and through into the side walls of a house to support an architectural design where it would not be possible to install a front porch. The overhang can easily be designed to accommodate gutters and downspouts, allowing water diversion away from windows with ease. This type of fascia is often used in modern architecture, where exposed trusses are desired, but require extra support at the top edge of the structure without resorting to traditional means for support such as columns or posts. Front-facing aluminum fascia may also replace a full porch if space is tight.
Effective cooling of a house is an essential requirement for comfort. External wall insulation, or cladding (in a building with brickwork) can be used to reduce heat loss from a building. Examples are:
Aluminum fascia may be found in the following locations on most homes built during the 1970s-1990s: attachment of gutters, soffit board, self-adhesive metal air conditioner covers, and exterior light fixtures.
Aluminum fascia may, in some cases, be used as a structure for attaching satellite dishes to homes built during the 1990s-2010s. They are usually attached flush with the rest of the fascia board on residences that were built during this period. The installation would have been done by either the homeowner or a professional roof repair company.
Boxed gutter systems typically feature horizontal channeling that rests atop the exterior walls and/or fascia boards. Aluminum panels attached over this channeling form a continuous surface above it which also hides any problems with wall roughness such as seams or cracks. The system allows the direct installation of gutters (or downspouts) on top of the channels with no extra framing required.
When used to conceal air conditioners, aluminum fascia is often attached using self-adhesive metal panels, which usually come in a variety of colors and patterns. Self-adhesive vinyl panels are also available for AC installations. These may be permanently or semi-permanently mounted into place using pressure-sensitive adhesive.
As an attachment point for rooftop satellite dishes, aluminum fascia can be used as a mounting surface if the roof has been designed specifically to support such an application. High-strength screws are typically inserted directly into the fascia boards through pre-drilled holes in order to secure the dish’s feet to it.
In the 1970s and early 1980s, aluminum fascia became a common feature in homes built in the United States. The primary purpose of adopting this material was to hide air conditioning units that were typically located under the overhang of a house’s roof repairs. If they were not hidden, these systems would have been visible as unsightly boxes with protruding vent pipes. However, in addition to hiding AC units, aluminum fascia boards could be attached into place to cover up cracks or seams in interior walls and/or ceilings if no other cladding material was available; this additional benefit is incidental rather than intentional.
Eaves fascia is any type of material used on the eaves or outside edge (uppermost edge) of a roof repair. This piece of fascia can withstand high wind loads, typical of those found in coastal regions or mountainous areas. Standard eaves fascia is made with wood as the primary component, which means it requires extra maintenance due to its vulnerability to rot and decay.
Aluminum fascia is an alternative material that may be used in addition to standard wood-based eaves fascia for buildings in all climates; particularly storm-prone areas like the Pacific Northwest where precipitation rates are very heavy and frequent. Aluminum’s superior corrosion resistance makes it an ideal choice since it will not splinter or warp from exposure to rainwater or snow melt.
Aesthetically, aluminum fascia also looks great compared to metal sidings such as steel and aluminum sidings for homes along the beach.
Aluminum fascia is a material that may be used to conceal air conditioners, much like vinyl or metal self-adhesive panels are used. The primary difference between these options is the aesthetic value of aluminum (versus vinyl) and its superior weather resistance properties (versus steel). In coastal areas, acid rain can eat away at desired metal siding and paint finishes over time; rendering them unsightly and potentially leading to structural damage to facades. Aluminum’s corrosion resistance makes it an ideal choice for buildings in climates where salt spray from seawater contributes to oxidation effects on building components.
Aluminum fascia was introduced as part of a new series of house models by Sears in the 1970s. The product was included with certain model numbers of the Sears Celebrity and Sears Craftsman houses, among others.
The term “aluminum fascia” is somewhat generic so variations to it have come about over time. Building codes across North America may refer to these aluminum board products as either “built-up fascia”, “screwed fascia”, or just simply “aluminum siding”. Other terms include:
Aluminum facings, Aluminum gutter liners, Aluminum gutter covers, Gutter extenders/fascia boards, and Gutter panels – this cover for gutters can be used instead of roof repair/roof shingles. They are often found on roofs when you go for roof repair and houses have air conditioning units and/or gutters.

The most common type of installation involves cutting a hole into the fascia boards using a saw ( roof repair), then inserting screws up through pre-drilled holes in the feet to secure them to the wood behind it. This method is often used when there are no other support brackets or fasteners nearby that can be attached to it. If not, this material is commonly nailed into place directly against an existing board by placing nails through its nailing flange onto exposed studs beneath; thereby eliminating any need for additional mounts or bracketry.
In addition to screws and nails (and occasionally bolts), aluminum fascia can also be secured into place with plastic anchors if desired. Screw types should never be longer than the thickness of the aluminum fascia itself as this may cause it to split. The same concerns are applicable to wood. Both are for roof repair.
The first half of the 1970s saw a multitude of building products and materials being introduced into North America, including aluminum siding panels which were used in lieu of clapboards (short-lap horizontal boards) on homes along the Atlantic Seaboard. New house models touted the benefits of aluminum siding over traditional materials like vinyl because it was harder to dent or damage from insects like termites and carpenter bees; both common pests in that part of Canada and the USA.
The primary difference between standard wood siding used on houses versus their paneled counterparts is that they do not overlap when installed. To hide the spaces between the boards, other materials like vinyl (instead of aluminum roof repair ) may be used to mimic the appearance of clapboards.
As with any house model associated with Sears, many parts and materials were also acquired from third-party manufacturers. Thus it is common to find houses where fascia boards are made out of wood but have been painted or stained to look as though they are made from aluminum. This practice was likely done because of cost concerns as less aluminum material would have had to be purchased during construction; thereby reducing the final costs for both consumers and builders alike.
It should be noted for repairing a roof that regardless of its composition, adding some type of protective finish/paint is recommended before installing fascia board products over a building’s exterior. This is in part due to the fact that aluminum’s natural color tends to reflect light, which can be seen through wood or other materials. Adding a top coat should also protect the fascia boards themselves from ultraviolet exposure and hence reduce any chances of them developing a green hue over time.
One way (that includes both nailing and screwing) of installing fascia board products onto existing homes:
Install plastic anchors into exposed studs/rafters behind the exterior wallboard using an electric drill and bit. It is important not to use screws here as they may damage the sheathing that covers exterior walls; thereby allowing water penetration into the home via its outer layer(s). Use metal brads/nails if desired for the nails.
Pre-drill holes and insert the fascia boards’ feet into the plastic anchors using a rubber mallet to secure them in place. Not all plastic anchors require pre-drilling beforehand.
Cutting wood trim to size, hanging it from wall studs or rafters with nails/brads (if desired), then securing it into place against the aluminum siding panels with finishing nails. As noted earlier, screws should not be used here nor for any other part of this process as doing so will more than likely damage neighboring elements on homes like sheathing; thereby allowing water penetration behind exterior walls.
If there are no studs or rafters available beyond plates found above windows and doors at either end of the exterior walls, they may be added using support brackets. These brackets should already be installed before installing any fascia boards on a house’s exterior. If only some windows and doors were covered with aluminum panels, it might be possible to install the metal without adding new studs/rafters in these areas.
Use finishing nails or screws (if wood is used for trim material) to secure the wood trim material to fascia board products; keeping them flush against each other as best as possible while pulling towards each other at 90-degree angles and use a rubber mallet if needed when driving them in place. Note: Some fascia boards have pre-drilled holes that can accept plastic anchors instead of their feet, while others have pre-drilled holes for the installation of screws.
Finally, use caulking material to seal gaps between fascia board products and surrounding walls/roofs; again make sure that no screws are installed here as they will damage sheathing/wood around windows and doors. This step should be completed before installing horizontal soffit panels above windows and doors (if any). The siding project on a house’s exterior is complete!